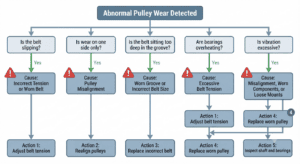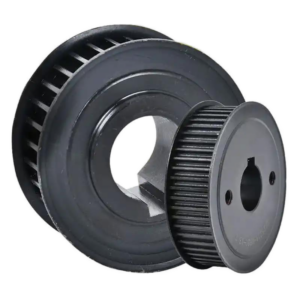
A belt pulley is one of the simplest components in a power transmission system, yet its installation has a direct impact on machine reliability. A pulley that is installed correctly can operate for years with minimal maintenance. One that is installed incorrectly may cause excessive belt wear, vibration, bearing overload, or shaft damage within a short period of time.
Many maintenance problems that appear to be caused by poor pulley quality are actually the result of installation errors. Slight shaft misalignment, excessive belt tension, or incorrect tightening of a taper lock bushing can gradually reduce power transmission efficiency and shorten the service life of multiple components throughout the drive system.
Whether you are fitting a new pulley to an electric motor, replacing a worn component on a conveyor, or installing a complete belt drive for new equipment, following a systematic installation procedure helps ensure stable operation from the very beginning.
This guide explains the installation process used in industrial applications, highlights the mistakes most commonly found during maintenance, and provides practical recommendations for improving long-term reliability.
1. Why Proper Pulley Installation Matters
Installing a pulley involves more than positioning it on a shaft and tightening a few bolts. Every step influences how the load is transferred between the motor, the belt, and the driven equipment.
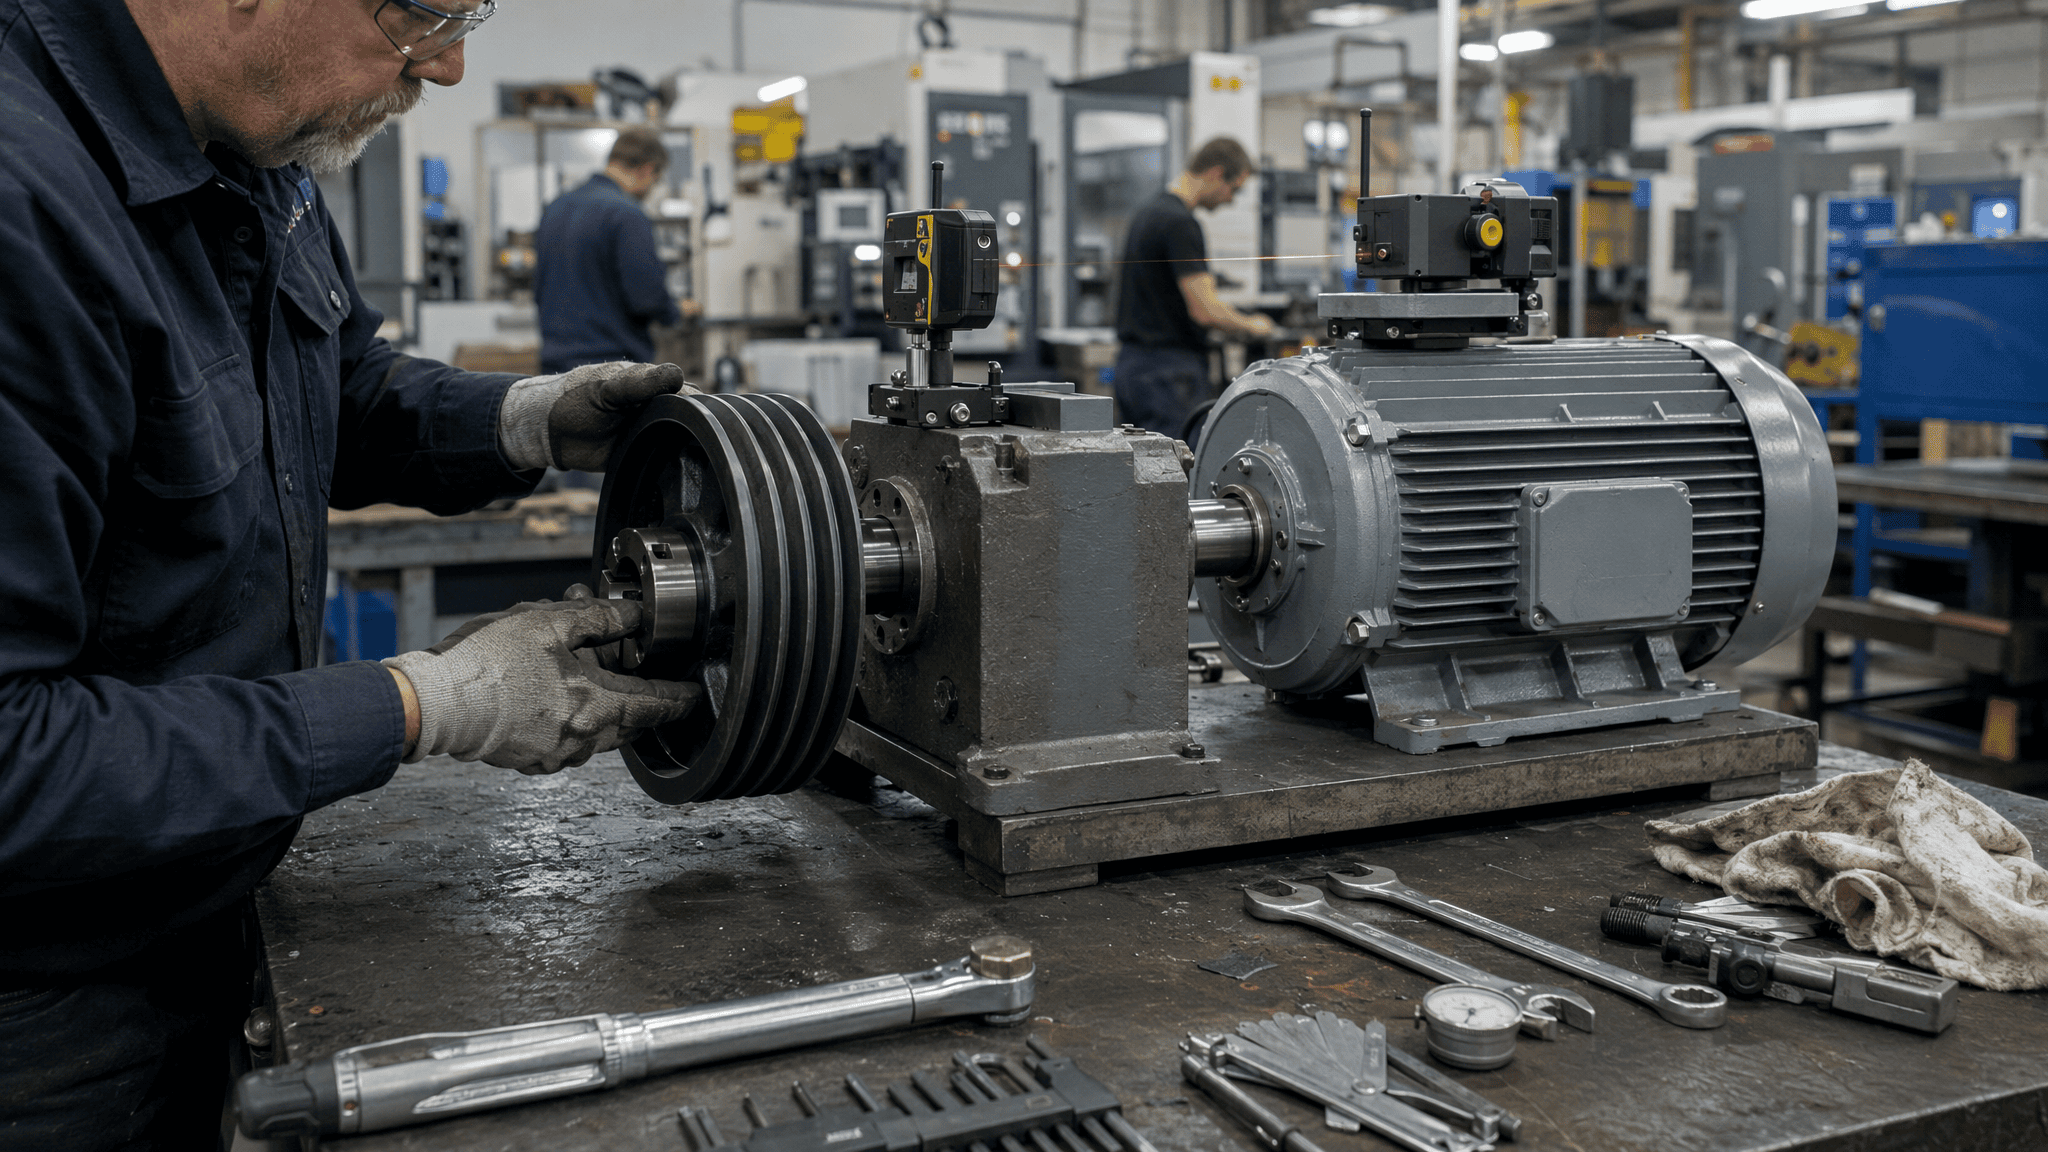
When a pulley is not aligned correctly, the belt no longer runs evenly within the grooves. Instead, additional side forces develop, increasing friction and placing unnecessary loads on bearings and shafts. These problems usually appear gradually, making them difficult to identify until abnormal noise or premature belt wear becomes obvious.
Incorrect belt tension creates a similar chain of problems. A belt that is too loose may slip during startup or under heavy loads, while excessive tension can overload bearings and reduce the operating life of both the pulley and the motor.
Even the tightening sequence of taper lock bush bolts deserves attention. Uneven clamping pressure may prevent the pulley from seating correctly, causing runout that becomes noticeable only after the machine reaches operating speed.
Although these issues often seem minor during installation, they can lead to unplanned maintenance and higher operating costs over time.
Engineering Note: In industrial power transmission systems, installation quality frequently has a greater influence on service life than the pulley itself. Careful alignment and correct assembly typically produce greater long-term benefits than simply selecting a higher-grade component.
2. Preparation Before Installation
Successful installation begins before the pulley is placed on the shaft.
Take a few minutes to inspect both the pulley and the mounting components. Small defects that are easy to overlook—such as burrs on the shaft, damaged keyways, or contamination inside the pulley bore—can prevent proper seating and affect alignment accuracy.
The shaft should be clean, smooth, and free from corrosion. Any raised material left after removing an old pulley should be carefully removed using appropriate tools. Avoid grinding the shaft aggressively, as excessive material removal may affect the fit between the shaft and the hub.
The key should fit firmly inside both the shaft and the pulley without excessive clearance. A loose key may introduce backlash during operation, while an oversized key can make installation unnecessarily difficult.
For taper lock pulleys, inspect the taper surfaces carefully. Dirt, oil, or metal chips trapped between the bush and the pulley can reduce clamping force and cause the assembly to loosen during service.
Before Installation, Verify the Following
- Shaft diameter matches the pulley bore
- Key dimensions comply with the shaft specification
- Keyway is clean and free from damage
- Pulley grooves show no cracks or deformation
- Taper lock bush is free from corrosion and contamination
- Mounting bolts and washers are in good condition
- Required installation tools are available
Taking time to complete these checks helps avoid many installation problems that would otherwise require the machine to be disassembled again after commissioning.
3. Installing the Pulley on the Shaft
One of the most common mistakes during pulley installation is using excessive force.
If a pulley does not slide onto the shaft smoothly, striking it with a hammer may seem like the quickest solution. In reality, impact loading can damage bearings, deform the hub, or create small alignment errors that become difficult to diagnose later.
Instead, the pulley should slide onto the shaft with light hand pressure once the shaft, key, and bore have been prepared correctly.
For taper lock systems, begin by positioning the bush inside the pulley hub and aligning the mounting holes. Insert the bolts finger-tight before fitting the assembly onto the shaft. Once the pulley reaches the correct position, tighten each bolt gradually in a diagonal sequence. This allows the bush to seat evenly around the shaft and produces a more uniform clamping force.
Avoid tightening one bolt completely before moving to the next. Uneven tightening may distort the bush slightly and reduce concentricity.
After tightening, rotate the pulley by hand. It should turn smoothly without noticeable wobble or resistance.
At this stage, do not install the belt yet. Alignment should always be checked before the drive system is fully assembled.
4. Pulley Alignment: The Most Important Step
Once the pulley has been mounted securely on the shaft, alignment should be checked before the belt is installed. This is often the step that determines whether the drive system operates smoothly for years or begins showing signs of wear after only a few months.
Even a slight alignment error changes the way the belt contacts the pulley grooves. Instead of distributing the load evenly across the belt, the drive begins pulling toward one side. The result is increased friction, uneven belt wear, higher bearing loads, and unnecessary energy loss.
In small machines, these problems may develop slowly. On larger industrial equipment operating continuously, however, even minor misalignment can significantly shorten the service life of belts, bearings, and shafts.
There are three types of pulley misalignment that should always be checked: angular misalignment, parallel offset, and axial misalignment. Each affects the transmission system differently, but all reduce operating efficiency if left uncorrected.
Choosing the Right Alignment Method
A straightedge remains a practical solution for many light-duty applications. When placed across the pulley faces, it provides a quick indication of whether both pulleys are positioned on the same plane.
For larger motors, pumps, compressors, and conveyor systems, laser alignment tools provide much greater accuracy. Modern laser systems allow technicians to identify even very small alignment errors while reducing setup time during maintenance.
Although laser alignment requires additional equipment, the improvement in transmission efficiency and bearing life often justifies the investment, particularly for continuously operating machinery.
Practical Alignment Tips
Before locking the motor into position:
- Rotate both pulleys by hand to check for excessive runout
- Confirm that both pulley faces lie on the same plane
- Verify that the shafts remain parallel
- Recheck alignment after tightening all mounting bolts
It is not unusual for alignment to change slightly after the motor base has been fully tightened. A final verification helps prevent unnecessary adjustments after commissioning.
5. Installing and Adjusting Belt Tension
Correct belt tension is just as important as pulley alignment. A well-aligned pulley system can still perform poorly if the belt tension is incorrect.
Many maintenance technicians instinctively tighten belts until they “feel right.” While experience certainly helps, belt tension should ideally be measured rather than estimated.
A belt that is too loose allows slipping during startup and under peak loads. Besides reducing transmission efficiency, slipping generates heat that accelerates belt wear and gradually polishes the pulley grooves.
Over-tightening creates a different set of problems. Excessive belt tension transfers unnecessary radial loads to motor bearings, driven equipment, and shafts. Although the belt may no longer slip, the additional bearing load often results in premature bearing failure.
Finding the correct balance is therefore essential.
Measuring Belt Tension
Most belt manufacturers provide recommended deflection values or tension ranges for their products. A belt tension gauge provides the most reliable measurement and helps achieve consistent installation quality across different maintenance teams.
Where no tension gauge is available, belt deflection can provide a useful reference, although it is generally less accurate than direct tension measurement.
Regardless of the method used, avoid making large adjustments in a single step. Small, gradual corrections make it easier to achieve the desired tension without overshooting the specification.
Recheck After Initial Operation
New belts normally experience a small amount of initial stretch during the first period of operation. For this reason, belt tension should always be inspected again after the machine has operated under load.
This simple follow-up inspection is frequently overlooked, yet it can significantly improve belt life and reduce the likelihood of unexpected slipping during normal production.
Engineering Tip: Excessive belt tension causes more long-term damage than slightly insufficient tension. While a loose belt usually produces visible slipping that can be corrected quickly, excessive tension silently increases bearing loads and often remains unnoticed until expensive mechanical failures occur.
6. Applying the Correct Torque
After the pulley has been aligned and the belt tension has been adjusted, the final installation step is tightening all mounting bolts to the specified torque.
Although this stage appears straightforward, incorrect tightening remains one of the most common causes of pulley loosening in industrial applications.
A bolt that is insufficiently tightened may gradually loosen as the machine vibrates during operation. On the other hand, excessive tightening can deform taper lock bushes, damage threads, or introduce unnecessary stress into the hub.
Neither condition improves reliability.
Why Torque Matters
Bolts do more than hold components together. Their primary function is to generate a controlled clamping force between the pulley, the bush, and the shaft.
If one bolt is tightened significantly more than the others, the clamping force becomes uneven. This may slightly shift the pulley from its intended position, affecting concentricity and increasing runout.
These errors are often too small to notice during installation but become evident once the machine reaches operating speed.
Best Practice for Tightening
Use a calibrated torque wrench rather than relying on feel or impact tools.
Tighten bolts gradually using a diagonal (cross) sequence instead of fully tightening each bolt individually.
Complete the tightening process in several passes until every bolt reaches the manufacturer’s recommended torque value.
After the first production run, verify the torque once more. Slight settling between the pulley and taper bush may reduce bolt preload during the initial hours of operation.
Engineering Tip: Impact wrenches are useful for removing bolts but should not be used to determine final tightening torque. Final tightening should always be completed using a calibrated torque wrench.
7. Commissioning Before Returning the Machine to Service
With installation complete, resist the temptation to place the equipment immediately into full production.
A short commissioning procedure allows any installation issues to be identified while the machine is operating under controlled conditions.
Begin by rotating the drive manually. The pulley should rotate smoothly without binding, rubbing, or noticeable resistance.
Next, operate the motor at low speed without load. Observe the belt carefully. It should remain centered within the pulley grooves without wandering toward either edge.
Listen for unusual sounds. A properly installed belt drive typically operates with a smooth, consistent mechanical sound. Metallic knocking, rhythmic clicking, or high-pitched squealing usually indicates an installation problem that should be investigated before normal operation begins.
As the machine reaches operating speed, monitor the bearings and pulley hub. Excessive temperature, abnormal vibration, or visible pulley wobble should never be ignored. Small installation errors detected during commissioning are usually inexpensive to correct, whereas continued operation may lead to significantly higher repair costs.
Once the machine has operated successfully without load, gradually introduce the working load while continuing to observe belt tracking and system stability.
8. Installation Mistakes Frequently Seen in the Field
Many pulley failures originate from a small number of installation mistakes that are repeated across different industries. Interestingly, these problems rarely result from poor component quality. They are usually caused by shortcuts taken during installation or maintenance.
The following examples are among the most common.
| Installation Mistake | Typical Result | Recommended Practice |
|---|---|---|
| Hammering the pulley onto the shaft | Hub damage and bearing shock | Install using proper fitting methods |
| Ignoring shaft alignment | Belt wear and vibration | Verify alignment before installing the belt |
| Tightening taper bush bolts unevenly | Poor concentricity | Tighten bolts gradually in a cross pattern |
| Applying excessive belt tension | Bearing overload | Measure belt tension using the recommended method |
| Skipping the post-installation inspection | Early component failure | Perform commissioning checks before production |
| Reusing worn keys or damaged bushes | Shaft movement and backlash | Replace worn components during installation |
These mistakes are easy to avoid, yet correcting them often delivers greater improvements in reliability than replacing belts or pulleys repeatedly.
9. A Practical Inspection Checklist
Before placing any newly installed pulley system into regular service, complete a final inspection. The checklist below is suitable for most industrial belt drive systems.
- Confirm the pulley is fully seated on the shaft
- Verify that the key is correctly positioned
- Check that all mounting bolts have been tightened to specification
- Inspect pulley alignment from multiple angles
- Verify belt tension using the recommended method
- Rotate the drive manually before startup
- Run the machine without load
- Observe belt tracking during operation
- Listen for abnormal vibration or noise
- Recheck bolt torque after the initial operating period
Although these inspections require only a short amount of time, they can prevent many of the problems that lead to premature maintenance or unexpected production downtime.
For reliable industrial belt pulleys and installation support, our engineering team is available to help you select the correct components for your application. Contact us today to discuss your project requirements.
Frequently Asked Questions
Should a pulley slide onto the shaft easily?
Yes. A correctly matched pulley should slide onto a clean shaft with light hand pressure. If excessive force is required, stop and inspect the shaft, key, and bore for burrs, contamination, or incorrect dimensions. Using a hammer to force the pulley into place can damage bearings, deform the hub, and introduce alignment errors before the machine even starts.
Is laser alignment necessary for every installation?
Not always. For small machines operating at relatively low loads, a straightedge can often provide acceptable alignment. However, for electric motors, pumps, compressors, conveyors, and other continuously operating equipment, laser alignment offers higher accuracy and helps reduce long-term maintenance costs.
How tight should a V-belt be?
A belt should be tight enough to transmit power without slipping, but not so tight that it overloads the bearings. Whenever possible, use the belt manufacturer’s recommended tension values or a calibrated belt tension gauge instead of relying solely on manual judgement.
Why should bolt torque be checked again after installation?
During the first few hours of operation, slight settling may occur between the pulley, taper lock bush, and shaft. Rechecking bolt torque after the initial run helps maintain the intended clamping force and reduces the risk of pulley loosening during normal operation.
Can pulley misalignment damage bearings?
Yes. Even a small alignment error increases side loading on both the belt and the bearings. Over time, this additional load accelerates bearing wear, increases vibration, and reduces transmission efficiency. Correcting pulley alignment benefits the entire drive system rather than the pulley alone.
How often should pulley alignment be inspected?
For equipment operating continuously, alignment should be checked whenever belts are replaced, motors are repositioned, bearings are changed, or abnormal vibration becomes noticeable. Including pulley alignment in scheduled preventive maintenance helps identify small problems before they develop into costly failures.
Should taper lock bushes be reused?
A taper lock bush that remains within specification and shows no signs of wear, cracking, corrosion, or thread damage can often be reused. However, if there is any doubt about its condition, replacement is usually the safer option. The cost of a new bush is typically much lower than the potential expense of an unexpected shutdown.
Conclusion
Correct pulley installation is not simply a maintenance task—it is an investment in the long-term reliability of the entire power transmission system.
A few additional minutes spent cleaning the shaft, checking alignment, measuring belt tension, and tightening bolts correctly can prevent months of unnecessary wear and unexpected downtime.
In many industrial facilities, pulleys, belts, bearings, and motors are expected to operate continuously under demanding conditions. Consistent installation practices help each of these components perform as intended while reducing maintenance frequency and improving overall operating efficiency.
Whether installing a standard V-belt pulley, a timing belt pulley, or a taper lock pulley assembly, following a structured installation procedure provides a solid foundation for reliable power transmission throughout the equipment’s service life.